
One of my recent finds on the web were batik pillowcases created with blue school gel and fabric paint. I still can't wait to try those, but while waiting for fabric paint to appear in mailbox, I thought Claire and I could try the same technique on watercolor paper. I thought the blue school gel would pull off just like rubber cement, a stinky chemical I don't like to use around kids.
Well...it didn't work quite as expected. The Elmer's Blue School gel that pulls effortlessly off fabric just tears paper. However, I'm not chalking this up as a failure, I think this is a pretty darn cool piece of are. Read on for the full tutorial at the end....


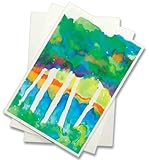
The glue reacted with the paint in such a unique way - the photo doesn't really capture how raised it is. The organic shape, texture and the reflectiveness adds up to a cool finished product in my book!
The white starbursts seen throughout the painting are pockets of salt on the liquid watercolors. Whenever Claire paints she usually asks for the salt grinder. It's a clever little piece of magic to watch the salt chase away the pigment underneath it. If you haven't tried salt and watercolors together, you must add it to your to-do list.
Speaking of liquid watercolors, check these out. I'm always receiving emails about where to buy them, and these are one of my favorite brands (and the ones that seem to be non-staining, especially important if you're making Bathtub Puffy Paint!)
Here are the exact products I've used. I think the watercolor paper in a pack of 100 is the most affordable option in terms of paper. You want something really thick and the 15 sheet pads are really pricy at my local crafts store.


Here is EXACTLY how we did this:
- Grab some Elmer's Blue School Gel and "draw" all over a piece of water color paper with it.
- Let the glue dry, the longer it dries, but more "3D" the painting will appear. We left it 8 hours.
- Once the glue is dry, paint over your picture and the glue using liquid watercolors.
- While the watercolors are still wet, sprinkle with salt (any kind in your kitchen will do)
- Congratulate your artist on a job well done and frame their masterpiece
UPDATE 2.14.2012
I finally got around to documenting with photos step by step our technique. Check out our Valentine's Post below for more inspiration.
Happy Crafting!


