Thursday

Embracing Simplicity during Christmas

I think as you have children, everything becomes more magical -- especially around the holidays. As Claire has gotten older (this will be Christmas # 5 for her, although I'm sure she's forgotten the first few) I've gotten excited myself just watching her anticipation and excitement grow as we draw closer and closer to the 25th.


In front of the BIG tree in Boston, MA

Last year we went to see the Nutcracker, spent hours in our pajamas making ornaments and generally became homebodies, enjoying each other and lots of warm drinks (hot chocolate for the kiddo, Mommy and Daddy discovered American Honey Bourbon and liberally added it to their hot mulled cider).

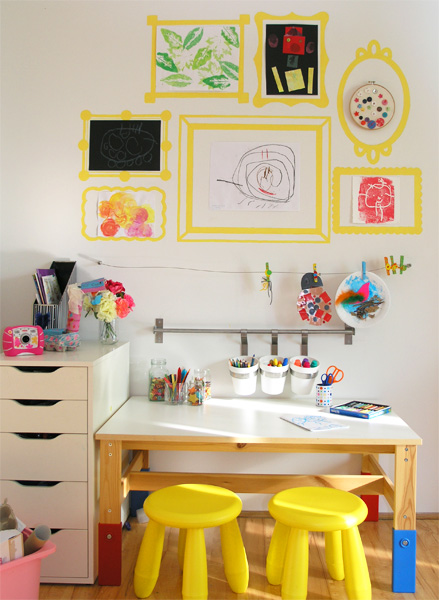
This year we're trying out an advent calendar. I'd like to do a lot before Christmas, but want to keep things stress free, simple and fun. Especially simple because, like always, I waited until the night before to get cracking. So here's what I'm working with:


Cute, right? I picked it up on sale last year and totally forgot about it until I opened up one of our Christmas boxes. I'm sure little candies would be nice in each cubby, but I wanted to go with an activity instead.

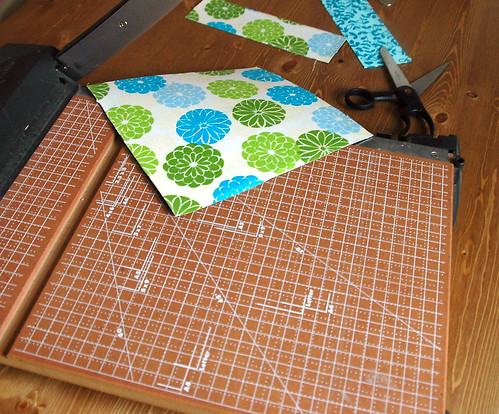
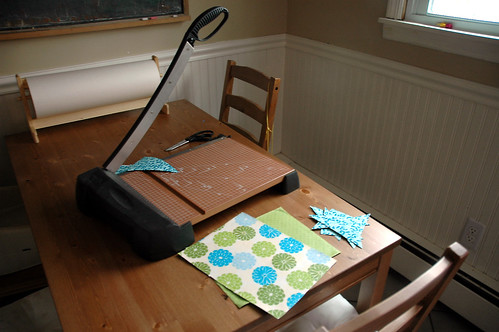
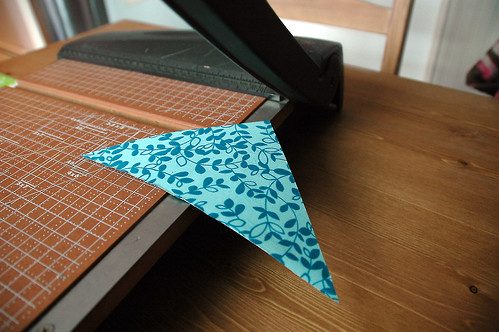
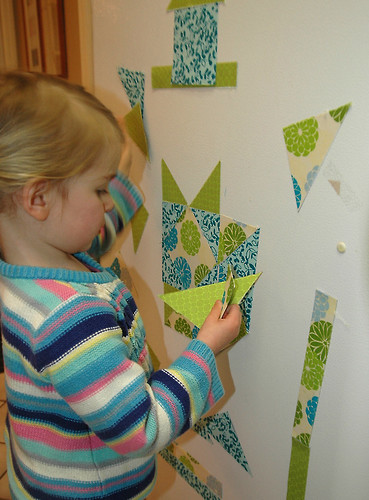
In each cubby (I've only filled up to #10...don't let the picture fool you) I've put a little picture or note detailing something special we'll do. Day 1 was a rolled up piece of paper with a mug of hot chocolate on it. Day 4 is a miniature banner which will be a clue about our art project that day. There is a picture of Claire with Dan and I in Day 6, where I wrote a little note about her first Christmas. I used regular old computer paper and tried to fold everything a few different ways to make it interesting. IKEA sells tiny little finger puppets that fit in the cubpoards perfectly and I'll add a few Hershey's Kisses scattered throughout as well. 

Simple, fun. And I can cheat and move them around if need be. Looking for more ideas? Check out these crafty calendars below. I'm thinking some of these could be nicely modified for a little math activity!


{a}  Beautiful family photos modpodged onto magnets over at Brenda Johnston's blog
{b}  Tiny matchbook boxes displayed in an apothecary jar at JustAGirlBlog
{c}  ASeptemberFeeling shares nature inspired goodies to hang on the tree
{d}  HouseToHome showcases a great way to reuse cans for a fun stacking calendar
{e}  Simple, elegant and lots of buttons for little ones to count. Brilliant, Missgioia


Wednesday

Why I should buy stock in scotch (tape that is)

There's a great article on Wired.com by GeekDad Jonathan Liu about the 5 Best Toys of All Time.

While I wholeheartedly agree about the joy of sticks, boxes, twine and above all dirt -- there is a glaring omission from his most excellent article:

Tape. And lots of it. Case in point:


Claire's version of London Bridge. Constructed completely on her own in a quiet hour which I used to whip up a 30 minute Rachael Ray dish (really, don't these always take like 20 minutes longer than they should?).

The bridge hung on until this morning when her bouncing turtle finally shook it from the couch.


So I say hand over a roll of tape to your little one, see where it takes them! It's cheap, easy to clean up and there's probably a half dozen rolls stashed in your junk drawer as you're reading this. 

Messy bedhead hair is of course optional, but I feel it adds to the experience.


Tuesday

Creative Idea for an Art Inspired Present

I'm always on the lookout for unique gifts that encourage creativity and I just had to share this one -- blank pop-up books. Paired with markers and a classic storybook it would make an awesome themed present.
You might recall I blogged about our mutual obsession with pop up books and a few of our favorites a while back. Now that Claire his hit age 4, she is really into storytelling AND still fascinated with the mechanics of pop up books. Her plots may meander a bit, but she's got lots of ideas and I'm looking forward to having a commemorative book or two celebrating her imaginative tales.

The pages look pretty sturdy and I imagine you could paint or decoupage them. My creative gears are churning away!

If you have older children and are looking for something really neat, check out this book. It's not quite as open ended and requires a bit more piecing things together, but in terms of paper mechanics, I think it's a great book!


Will your little ones be unwrapping any creative gifts this year?

Wednesday

Setting Up Our Art Room and a Case of Blue Measles

I've unearthed a few great photos from my old computer:


Modern Parents Messy Kids
I took this shortly after our move to the new house when I let Claire loose with a bunch of paint and paper to keep her occupied while I neatly (ha!) unpacked our belongings. Unbeknownst to me she discovered spatter painting and seemed to have missed the paper but did a remarkable job on her face. 

Childhood 101
I'm so excited to have a room set aside for messy projects just off the kitchen. It's 11 feet by 6 feet and sized just right for a long counter and a storage shelf. There's a large south facing window that lets in great light. I've been scouring blogs for some inspiration on setting up an art space where Claire could work independently and leave enough room for when the two of us worked on a project together.
Art Studio in the Artful Parent's laundry
room, love the batik curtains!

I've always admired the set up in home of The Artful Parent where she hosts a toddler art group in a studio that doubles as her laundry room. There's been a few iterations in the design as her children have grown, so search through her archives for more ideas. I also love the art nook over at Modern Parents Messy Kids, a great (and affordable) set up that would tuck into a small space beautifully.

The other space I've been drooling over is at Childhood 101. The colorful frames and well organized materials...what's not to love? I've got a bunch of frames left over and I might spray paint them in some uniform color and arrange them in a collage (sans glass) for a revolving gallery.

Time, time, time is what I need more of. We're busy cutting down trees that were damaged in a freak October snowstorm and repairing fences. You know, all the usual stuff that keeps a person from the FUN tasks. On the bright side, I'm becoming adept at handing an  axe and my husband has promised a chainsaw lesson. Before you know it I'll be carving up those cute chainsaw bears that my daughter loves at the fair:


Sunday

The perfect pet for preschoolers...bring back the pet rock!


Knee deep in fall bulbs and covered (COVERED!) in dirt I was patting myself on the back this afternoon for cultivating Claire's imagination with lots of fresh air and freedom and unstructured play. She was constructing this elaborate house for Rocky, her pretend friend. Daddy was busy fixing the greenhouse and donated lots of leftover 2x4 bits and a few soft bits of wild onion grass and leaves made a perfect bed...for a rock. Yes, a rock named Rocky...cue the laugh track.

My self congratulations turned to abrupt giggles when I realized my imaginative daughter was playing with this small boulder, cooing to it even. And yes, I know that's imagining and all but I just couldn't help cracking cracking up at the name and the elaborate house building and the storyline of her pet.

It was almost as funny as Claire and her little girlfriends giving birth to dolls (through their collars mind you) at a recent play date.


I can't help but wonder if the whole pet rock craze back in the day was dreamt up by some busy parent who left their bored children alone one afternoon to come up with their own fun. In that case, I'm patenting sticks, pine-cones and pennies because they keep my tyke endlessly amused.

Saturday

Nature Table -- Take Two

There's a nice wide foyer in our new house so I was so happy to recreate the nature table we had set up at the old place. I snagged a divided cubby from Freecycle a while back, and Claire played post office with it until I realized it would be perfect for sorting all the goodies she brings in from outside.

9 spots filled with an assortment of special pebbles, a black walnut and a few dead bugs. But check out the top - those are the biggest leaves we've ever found. I'm not sure of the species, they resemble maple leaves and are the size of my head!


Stopping off to empty pockets and rearrange her treasures...just another day in the life of a four year old. Having a dedicated place like this for our little naturalist to showcase her goodies has turned a mess waiting to happen into an evolving display of each season's beauty. We've had everything from wildflowers to colorful leaves to sculptural twigs and I think it's all be just beautiful.

And the fact that I'm NOT finding this stuff stashed in my bookcases and under her bed keeps me happy.

Watercolor Autumn Garland


Is there nothing you CAN'T make beautiful with liquid watercolors? We've used them to dye macaroni, as the color base for bathtub puffy paint and as part of our watercolor and batik on paper experiment but my favorite media to drip the saturated color on has to be coffee filters.

I love watching Claire concentrate with her tongue poking out of pursed lips (so like her father) as she watches the colors run together trying to create the perfect shade of "turk-a-boys." That's turquoise for those of you not schooled in Claire-speak.

We've got a giant tree filled with round colorful leaves and I persuaded Claire to donate a few of her creations for a little autumn garland for the mantle. This is inspired by Rebecca Cooper's St. Patrick's Garland which I've been drooling over for the past few months. I just adored her use of book pages as background and found quite a few to tear apart upon unpacking in our new house (who knew my old computer science texts would be irrelevant just a few short years after college).

Pack of 6 Liquid Watercolors for $12.98

If you're looking for an affordable set of liquid watercolors, check these out, a pack of 6 for about $13 has lasted us well over a year. They're super saturated and can be diluted to make them stretch. I also love the ones from Discount School Supply. 

Happy Painting!


Monday

Falling For Autumn

Well hello friends! Excuse my long absence, I'm back in the swing of things and eager to reconnect with all my bloggy-land friends!

New House, New Pets! Meet Claire and Claire the Chicken.

We're happily settling into our new home and after a few weeks (months!) of craziness, I've got quite a back log of exciting crafts and activities to share.

I must first say thank you to all the well-wishing friends who sent emails checking up on us after I took a long break from blogging. Things have been hectic but VERY exciting and I cannot say how much I appreciate folks from around the world (um...wow!) reaching out to me.

Home. Sweet. Home.


Tonight we celebrated Daddy-O's birthday (Daddy-o Scare-io and Mommy-O Scare-io are our nicknames given by Claire this summer -- and no I have no clue where they came from). Dan's birthday signals the end of summer for us, so in the next week we'll be celebrating autumn with seasonal crafts starting tomorrow with a little leaf project!

Lanceovate and Obovate are my favorite names!

I have a few favorite projects from the archives if you're itching for some "right now!" inspiration:

Leaf Rubbing Collage


Coffee Filter and watercolor leaves on chalkboard

Freaky Halloween Hand Meatloaf

Wednesday

Take a Bite out of Summer with Silly Watermelon Pics

I was browsing through some old photos on my computer and came across a series of shots from Summer 2008. Claire had realized her love of watermelon, and I realized my love of ridiculously huge props for kiddie photography.


Slice up a HUGE piece of watermelon and have your camera handy for the hilarious photo op.

Now if you'll excuse me, I have just been invited to a tea party in my daughter's kiddie pool.


Monday

Guest Post by The Book Chook: Digital Art Websites for Kids

If you've been wondering about my sudden disappearance - it's all been for a good cause. Our house has SOLD! I won't jinx things by packing yet, but we're out of attorney review and pending the "all-clear" on the inspection, we'll be moving to our new home (dubbed Frog Pond Farm) the first of August!

Back in January when I took the plunge and starting blogging publicly, Susan of The Book Chook left one of the very first comments on my blog. If you've never been introduced to her site, it's a treasure trove of literacy activities, laughs and lots of book reviews. I'm excited to have her guest posting here about the convergence of technology and art. Susan has rounded up a group of kid-friendly sites where kids can try their hand at digital art. Take it away, Susan!

Friday

Pizza Box Loom -- A Cardboard Box Challenge

To celebrate her blog's one year anniversary, Rachelle of Tinkerlab issued a challenge - do something fun with a cardboard box and share it with the world.

We've raided the recycling bin before for cardboard boxes (the peanut butter covered YUM sign was my personal favorite) but I tried to come up with something unique this time. And something not too messy because last night when a buyer gave me 10 minutes notice to see the house, I wound up putting a sinkful of dirty dishes in my car. Yeah, not my best moment but the house looked good!

My original thought was to create a solar oven out of a pizza box, but Claire has been obsessed with my scrap pile of fabrics (I've been busy whipping up curtains and she plays "sewing" or "spaghetti" with the scraps) so I instead I whipped up a cardboard loom for her.


The "how-to" for this project could not be easier, and for the minimal effort put into this, it kept Claire busy for a good hour.

While eating the pizza, I cut long vertical slits into the box.


See them below? Claire thought if she laid in the box she could be a pizza that "Mommy would gobble up in kisses." This kid cracks me up.


We raided the scrap pile for a hodpodge of fabrics. Recognize the blue and green ones from the refrigerator quilting project?


I got things started for her and Claire pulled the fabric through each row. It was tricky for her to get the hang of it, but after a few minutes she was able to take over. If the slits had been wider vertical slats rather than single line cuts, weaving would have been easier.

Wednesday

Before and After -- Rooster Kitchen Renovation

There was a such a great response to Claire's room "before and after" that I'm going to share our kitchen - an even more dramatic turnabout. I don't want to turn into a decorating blog, but with our house on the market we've been living, breathing and squealing "house, house, house!" Even Claire has been pitching in to clean "afore the real-ladies come by."

Besides -- since I'm my own boss here, I can make the rules, right?! ;-)


Here's the before. We passed a year surrounded by roosters, blue checked (bathroom?) tile and dark brown Formica cabinetry. A new kitchen was out of the question (and out of the budget) but we managed to turn a dark, depressing room into one of my favorite spaces in our house.


You'll notice as you look through the archives we kept the tile for a long time (once the cabinets were white, it was entirely bearable). When we put the house on the market 2 weeks ago we ripped up the tile and put a new formica countertop in. Granite would have been fantastic, but for around $300, the Formica (on clearance!) was cheap, easy and totally changed the room.


All of the paint is "oops" paint from the Home Depot, and yes, I PAINTED the formica cabinets. Automotive primer is a girl's best friend and it was a summer project to remember - lots of fumes, tons of suicidal insects and an unintended "open cabinetry" look that lasted well over 4 months. Such is life!


What do you think? Looks like a whole new room to me! I'm no design star but I'm loving my "new" kitchen and am soooo not sorry to see that nasty grout gone.

Thursday

Featured Guest: Jen of Paint Cut Paste | Leaf-Print Garden Flags


Please welcome Jen from PaintCutPaste today! She's an art therapist and Mom to a four year old daughter, who seems to love creative expression as much as her mama. Jen's training in art therapy shines through the projects she creates, her blog is full of age-appropriate art experiences and material explorations that inspire confidence in a budding artists and above all else -- fun! Spring is in the air and I'm delighted Jen is sharing a tutorial that can be put to use in our garden. What a great way to celebrate Earth Day!

Tuesday

Creepy Crawly Friends Weave Wondrous Textile

I've blogged before about Claire's love of many-legged critters and how we've observed them (to her grandparents horror) in our glass cake stand for a few days. When I came across this article in Wired Magazine on a spider silk textile project,  I immediately read it with Claire.

Of course I nearly snorted my coffee when I read the line, "Unlike silk worms, which are easy to raise in captivity, spiders have a habit of chomping off each other’s heads when housed together."

Oh. Dear.


What an interesting read about how the industrious folks in Madagascar collected wild golden orb spiders who were "milked" of silk and then released, unharmed, to resume their bug control duty back in the wild.


Of course Claire now wants a million (or twenty-teen) spiders of her own to weave a blanket for huggy bear. If my sister is reading this, I'm sure she's having flashbacks of the time Mom bought me an ant farm and the sleepy, half frozen ants woke up with a vengeance and swarmed the kitchen. Poor Laurie. I do believe she is scarred for life.


Nature is truly wondrous and I'm hoping to make the trip to NYC to check out this amazing textile, I just wish we could touch it!

I love the idea of sharing age-appropriate current events with young children and would love to hear how you incorporate recent news and science developments in your classroom or home!

Check out the article here:
http://www.wired.com/wiredscience/2009/09/spider-silk/
Photos above from Wired

Monday

A Big Hello to New Readers!

Wow, hello world! Nothing like a few thousand visitors in one day stopping by to say hi!

A lot of new friends have arrived since Marie of Make and Takes wrote about Chalk In My Pocket as one of the "9 kid craft sites you've got to know." I'm unbelievably flattered, and thrilled to be sharing the spotlight with a bunch of my favorite bloggers.

If you're new, you might enjoy these recent crafty posts, they'd be perfect playdate activities, something you could "make and take!" :-)

 
The very popular bathtub puffy paint, guaranteed to get even the most reticent bather happily covered in colorful soap. I can vouch that it didn't stain my marble or grout.
 
Get your nest on! It's early spring (in my hemisphere at least) and the birds are looking for materials to weave into homes. Lend 'em a hand and reap the reward of pink, sparkly nests to observe baby chicks.


Reuse packing peanuts as a sculpting medium. Just add water and they magically stick together. File sorting stickers optional but much recommended for realistic polka-dot snake.

Thanks for stopping by and don't be shy, I love when people leave comments and interact on Facebook!


Friday

"Quilting" with Mod Podge and Magnets

Years ago, when my husband’s aunt got wind that I was interested in quilting, a package arrived with bunches of perfectly matched fabric squares, a few “how-to” books and a wonderful children’s book called "The Quiltmaker's Gift.” Well, my sewing machine is still dusty and the squares unsewn, but I’m happy to report we’ve been enjoying some "quilting” on the fridge thanks to magnetic paper, mod podge and fabric. The Quiltmaker's Gift has a page on common quilt squares which we’ve been trying to replicate with our magnet quilt!

The cast of characters for a No-Sew ModPodge Magnetic Quilt:

Mod Podge, Magnet Sheets, Cute Fabric

I’m embarrassed to admit that this is my first time working with ModPodge, it should give you some indication as to how foolproof this craft is. So foolproof that my three year old daughter actually did most of the work:

DSC_0539

I started with a generous helping of ModPodge on the magnet sheets. A few dabs on the underside of the fabric helped hold things in place. I’m sure you could just glue the fabric directly to the magnet sheets, but I’m hoping the ModPodge will protect the fabric from some of the kitchen grime that seems to show up on the fridge (please, tell me
it’s not just my fridge that gets spattered with food from across the
room!)
Chalk In My Pocket Magnetic Quilt with Mod Podge

No matter what I seemed to do, a few inevitable bumps showed up.  Perhaps ironing the fabric first would have taken care of this? Too much like work. I just invited Claire to smash the bubbles down with her hand. Yet another reason to craft with a three year old, they love  popping bubbles.

http://www.chalkinmypocket.com Mod Podge Quilt, avoiding
bumps

I left an overhang of about quarter of inch around the magnet sheets. This allowed for decent coverage on those pesky corners. They are quick to trim later.

DSC_0544

Let everything dry a good 30 minutes before cutting the quilt apart. I used my handy paper
cutter
(or guillotine as my husband calls it) to avoid whipping  out a ruler. Trim the long end to 8.5 inches to make a square.

How to cut even triangles on slicer,
http://www.chalkinmypocket.com

Once you’ve got a square, cut across to make two large triangles.  If you’re using a paper cutter line it up with that 45 degree guide. Handy isn’t it? You’ll wind up with two large triangles.

DSC_0627

I found the best way to get perfectly matched pairs of triangles  was to line the point of the triangle slightly past the edge of the cutting area. The more time you spend making careful, precise cuts the
better the pieces are going to fit together later!

DSC_0630
Each of the 8.5 inch squares yielded a good number of triangles to  work with (we started with 8 medium and then halved 2 of those again). You could keep cutting them in half but I wanted Claire to be able to handle the pieces easily.

DSC_0643
At the moment, there is a nice little quilt square in the center of  our fridge and quite a few “houses” are springing up as well. I love having an activity set up on the fridge. It’s a no-mess way to keep my daughter entertained and the fact that this sneaks in a little mathematical  reasoning is an added bonus. Of course the cheery colors and patterns don’t hurt my kitchen décor!

EDITED TO ADD --
 
I've been receiving frequent emails about where to aquire the 8.5x11 magnet sheets. Check out your local office supply store (tell them you're looking for printable magnet paper) or buy them here on Amazon. You're going through my affiliate link so I'll get a few pennies for craft supplies :)


DSC_0636