Wednesday

Before and After -- Rooster Kitchen Renovation

There was a such a great response to Claire's room "before and after" that I'm going to share our kitchen - an even more dramatic turnabout. I don't want to turn into a decorating blog, but with our house on the market we've been living, breathing and squealing "house, house, house!" Even Claire has been pitching in to clean "afore the real-ladies come by."

Besides -- since I'm my own boss here, I can make the rules, right?! ;-)


Here's the before. We passed a year surrounded by roosters, blue checked (bathroom?) tile and dark brown Formica cabinetry. A new kitchen was out of the question (and out of the budget) but we managed to turn a dark, depressing room into one of my favorite spaces in our house.


You'll notice as you look through the archives we kept the tile for a long time (once the cabinets were white, it was entirely bearable). When we put the house on the market 2 weeks ago we ripped up the tile and put a new formica countertop in. Granite would have been fantastic, but for around $300, the Formica (on clearance!) was cheap, easy and totally changed the room.


All of the paint is "oops" paint from the Home Depot, and yes, I PAINTED the formica cabinets. Automotive primer is a girl's best friend and it was a summer project to remember - lots of fumes, tons of suicidal insects and an unintended "open cabinetry" look that lasted well over 4 months. Such is life!


What do you think? Looks like a whole new room to me! I'm no design star but I'm loving my "new" kitchen and am soooo not sorry to see that nasty grout gone.

Thursday

Featured Guest: Jen of Paint Cut Paste | Leaf-Print Garden Flags


Please welcome Jen from PaintCutPaste today! She's an art therapist and Mom to a four year old daughter, who seems to love creative expression as much as her mama. Jen's training in art therapy shines through the projects she creates, her blog is full of age-appropriate art experiences and material explorations that inspire confidence in a budding artists and above all else -- fun! Spring is in the air and I'm delighted Jen is sharing a tutorial that can be put to use in our garden. What a great way to celebrate Earth Day!

Tuesday

Creepy Crawly Friends Weave Wondrous Textile

I've blogged before about Claire's love of many-legged critters and how we've observed them (to her grandparents horror) in our glass cake stand for a few days. When I came across this article in Wired Magazine on a spider silk textile project,  I immediately read it with Claire.

Of course I nearly snorted my coffee when I read the line, "Unlike silk worms, which are easy to raise in captivity, spiders have a habit of chomping off each other’s heads when housed together."

Oh. Dear.


What an interesting read about how the industrious folks in Madagascar collected wild golden orb spiders who were "milked" of silk and then released, unharmed, to resume their bug control duty back in the wild.


Of course Claire now wants a million (or twenty-teen) spiders of her own to weave a blanket for huggy bear. If my sister is reading this, I'm sure she's having flashbacks of the time Mom bought me an ant farm and the sleepy, half frozen ants woke up with a vengeance and swarmed the kitchen. Poor Laurie. I do believe she is scarred for life.


Nature is truly wondrous and I'm hoping to make the trip to NYC to check out this amazing textile, I just wish we could touch it!

I love the idea of sharing age-appropriate current events with young children and would love to hear how you incorporate recent news and science developments in your classroom or home!

Check out the article here:
http://www.wired.com/wiredscience/2009/09/spider-silk/
Photos above from Wired

Monday

A Big Hello to New Readers!

Wow, hello world! Nothing like a few thousand visitors in one day stopping by to say hi!

A lot of new friends have arrived since Marie of Make and Takes wrote about Chalk In My Pocket as one of the "9 kid craft sites you've got to know." I'm unbelievably flattered, and thrilled to be sharing the spotlight with a bunch of my favorite bloggers.

If you're new, you might enjoy these recent crafty posts, they'd be perfect playdate activities, something you could "make and take!" :-)

 
The very popular bathtub puffy paint, guaranteed to get even the most reticent bather happily covered in colorful soap. I can vouch that it didn't stain my marble or grout.
 
Get your nest on! It's early spring (in my hemisphere at least) and the birds are looking for materials to weave into homes. Lend 'em a hand and reap the reward of pink, sparkly nests to observe baby chicks.


Reuse packing peanuts as a sculpting medium. Just add water and they magically stick together. File sorting stickers optional but much recommended for realistic polka-dot snake.

Thanks for stopping by and don't be shy, I love when people leave comments and interact on Facebook!


Friday

"Quilting" with Mod Podge and Magnets

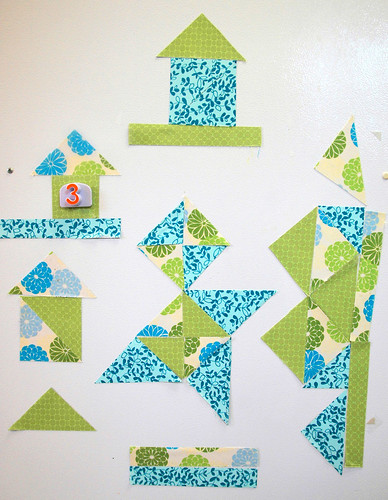
Years ago, when my husband’s aunt got wind that I was interested in quilting, a package arrived with bunches of perfectly matched fabric squares, a few “how-to” books and a wonderful children’s book called "The Quiltmaker's Gift.” Well, my sewing machine is still dusty and the squares unsewn, but I’m happy to report we’ve been enjoying some "quilting” on the fridge thanks to magnetic paper, mod podge and fabric. The Quiltmaker's Gift has a page on common quilt squares which we’ve been trying to replicate with our magnet quilt!

The cast of characters for a No-Sew ModPodge Magnetic Quilt:

Mod Podge, Magnet Sheets, Cute Fabric

I’m embarrassed to admit that this is my first time working with ModPodge, it should give you some indication as to how foolproof this craft is. So foolproof that my three year old daughter actually did most of the work:
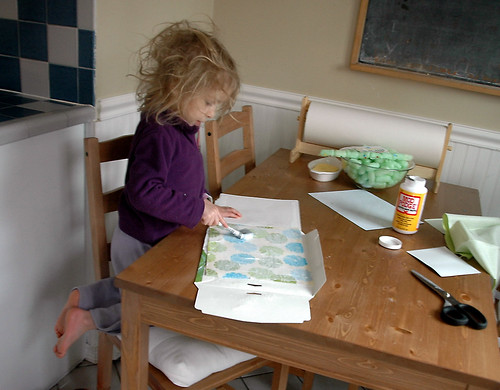
DSC_0539

I started with a generous helping of ModPodge on the magnet sheets. A few dabs on the underside of the fabric helped hold things in place. I’m sure you could just glue the fabric directly to the magnet sheets, but I’m hoping the ModPodge will protect the fabric from some of the kitchen grime that seems to show up on the fridge (please, tell me
it’s not just my fridge that gets spattered with food from across the
room!)
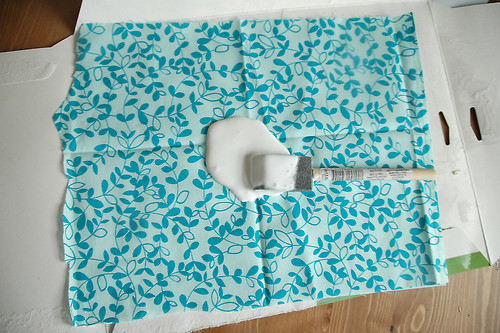
Chalk In My Pocket Magnetic Quilt with Mod Podge

No matter what I seemed to do, a few inevitable bumps showed up.  Perhaps ironing the fabric first would have taken care of this? Too much like work. I just invited Claire to smash the bubbles down with her hand. Yet another reason to craft with a three year old, they love  popping bubbles.
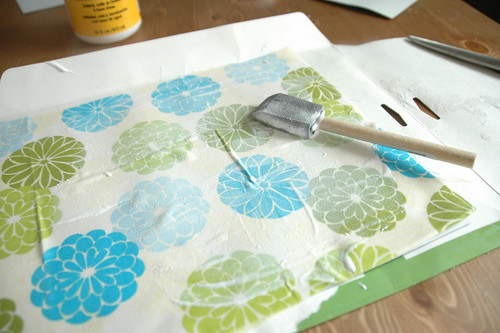
http://www.chalkinmypocket.com Mod Podge Quilt, avoiding
bumps

I left an overhang of about quarter of inch around the magnet sheets. This allowed for decent coverage on those pesky corners. They are quick to trim later.
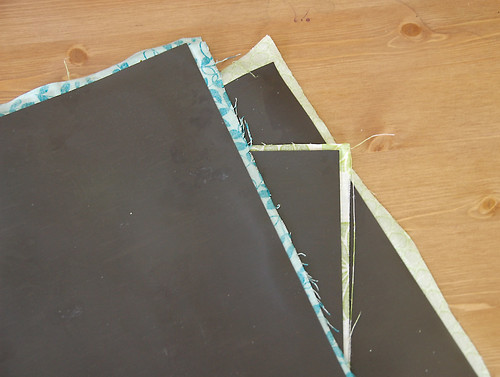
DSC_0544

Let everything dry a good 30 minutes before cutting the quilt apart. I used my handy paper
cutter
(or guillotine as my husband calls it) to avoid whipping  out a ruler. Trim the long end to 8.5 inches to make a square.
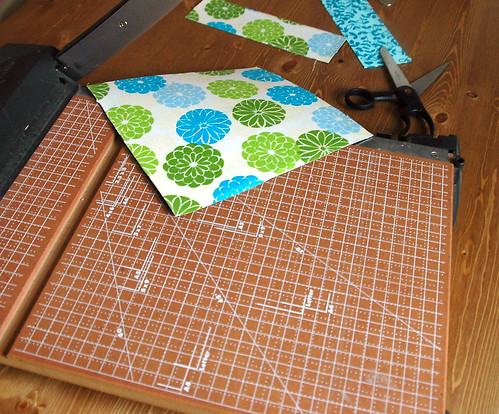
How to cut even triangles on slicer,
http://www.chalkinmypocket.com

Once you’ve got a square, cut across to make two large triangles.  If you’re using a paper cutter line it up with that 45 degree guide. Handy isn’t it? You’ll wind up with two large triangles.
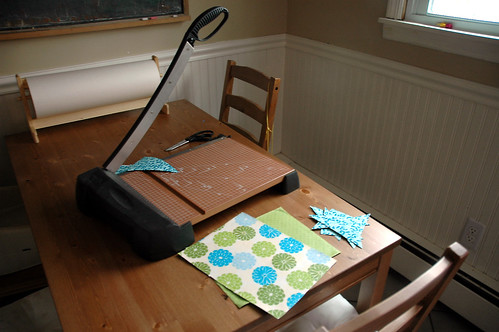
DSC_0627

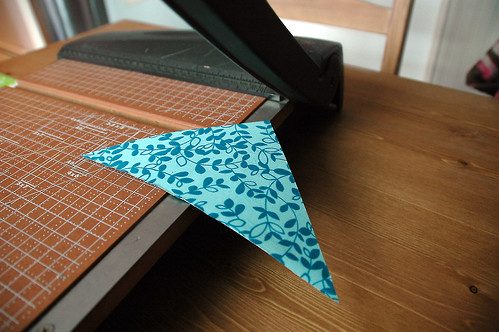
I found the best way to get perfectly matched pairs of triangles  was to line the point of the triangle slightly past the edge of the cutting area. The more time you spend making careful, precise cuts the
better the pieces are going to fit together later!
DSC_0630
Each of the 8.5 inch squares yielded a good number of triangles to  work with (we started with 8 medium and then halved 2 of those again). You could keep cutting them in half but I wanted Claire to be able to handle the pieces easily.
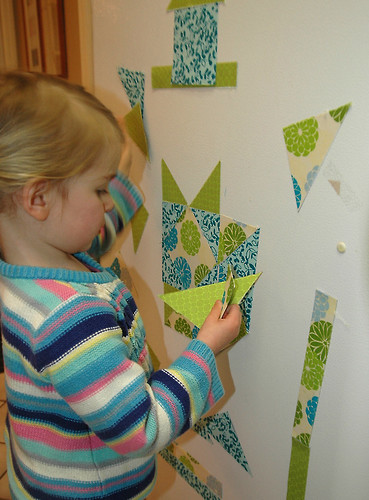
DSC_0643
At the moment, there is a nice little quilt square in the center of  our fridge and quite a few “houses” are springing up as well. I love having an activity set up on the fridge. It’s a no-mess way to keep my daughter entertained and the fact that this sneaks in a little mathematical  reasoning is an added bonus. Of course the cheery colors and patterns don’t hurt my kitchen décor!

EDITED TO ADD --
 
I've been receiving frequent emails about where to aquire the 8.5x11 magnet sheets. Check out your local office supply store (tell them you're looking for printable magnet paper) or buy them here on Amazon. You're going through my affiliate link so I'll get a few pennies for craft supplies :)


DSC_0636


Tuesday

We are still here :-)

I got three emails from concerned friends in bloggy land this morning all wondering if Claire, Dan or I were sick. Seems I had a good thing going with posting multiple times a week!

No worries, we're all fine - just moving! After flirting with the idea for a few weeks, our real estate agent showed us a house we totally fell in love with so we have raced to ready our home for sale. We've painted nearly every room in the house, installed new trim, renovated both bathrooms and cleaned out seven years worth of clutter from every nook and cranny (but the attic that is, I'm hoping no one dares to look up there).

Does everyone love a good before and after photo or should I avoid becoming a decorating blog? Perhaps I'll just share Claire's room today - mind you it never looks THIS good.

The Before (the day we found our current home)


And here is Claire's room today. We keep a metal bucket of crayons and art supplies on that hook over her table and there were some cute hanging birds over the easel that I need to put back up.


I dislike hanging clothes nearly as much as folding socks so all of Claire's clothes (even dresses) are folded up in the dresser freeing up the closet for a little reading nook.

 
Claire wants her stripes to come with her to the new house, and this time I'll be sure to use a level when painting them. Hopefully they're not too wonky for the next people!

Sunday

Featured Guest : Make. Do. See. Be.

Please give a warm welcome to my first featured guest, Abbe of Make. Do. See. Be. She's a creative mama who whips up the sweetest sewing projects. I love her festive garland tutorial, a great project for young helpers! Be sure to check out her blog, you won't want to miss her DIY busy board filled with goodies from the hardware store.

Hi everyone!  We are a dynamic team of a mama, Abbe aka the big, and a toddler, Augustus aka the little.  Most of our together time is spent outside but living in the woods deep in the heart of New England means long winters inside.  We like to do a variety of creative activities but my true love is to design and sew anything I could get my hands on and most of these projects involve the little sitting upon my lap at my machine.