
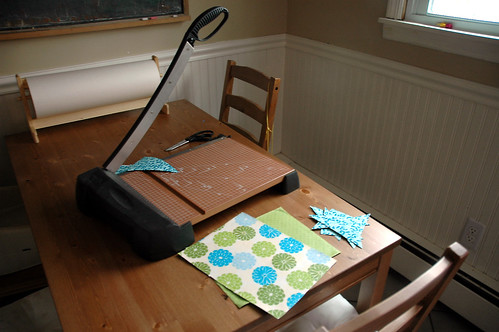
The cast of characters for a No-Sew ModPodge Magnetic Quilt:
Mod Podge, Magnet Sheets, Cute Fabric
I’m embarrassed to admit that this is my first time working with ModPodge, it should give you some indication as to how foolproof this craft is. So foolproof that my three year old daughter actually did most of the work:
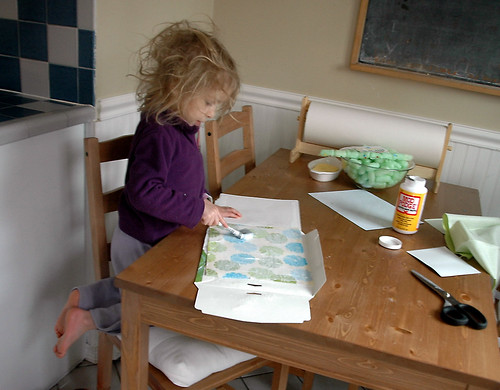
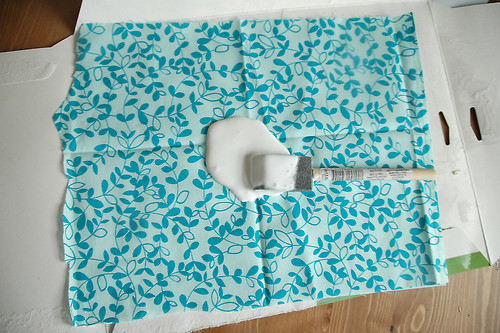
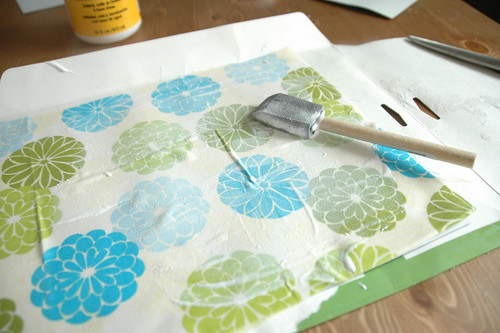
I started with a generous helping of ModPodge on the magnet sheets. A few dabs on the underside of the fabric helped hold things in place. I’m sure you could just glue the fabric directly to the magnet sheets, but I’m hoping the ModPodge will protect the fabric from some of the kitchen grime that seems to show up on the fridge (please, tell me
it’s not just my fridge that gets spattered with food from across the
room!)
No matter what I seemed to do, a few inevitable bumps showed up. Perhaps ironing the fabric first would have taken care of this? Too much like work. I just invited Claire to smash the bubbles down with her hand. Yet another reason to craft with a three year old, they love popping bubbles.
I left an overhang of about quarter of inch around the magnet sheets. This allowed for decent coverage on those pesky corners. They are quick to trim later.

Let everything dry a good 30 minutes before cutting the quilt apart. I used my handy paper
cutter (or guillotine as my husband calls it) to avoid whipping out a ruler. Trim the long end to 8.5 inches to make a square.
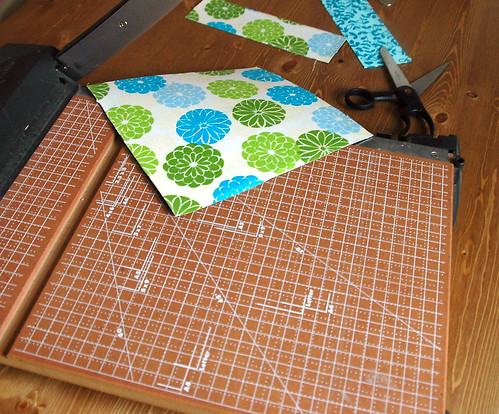
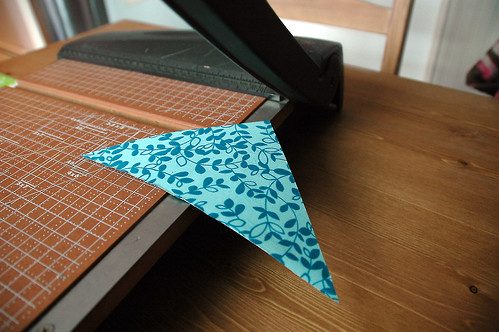
Once you’ve got a square, cut across to make two large triangles. If you’re using a paper cutter line it up with that 45 degree guide. Handy isn’t it? You’ll wind up with two large triangles.
I found the best way to get perfectly matched pairs of triangles was to line the point of the triangle slightly past the edge of the cutting area. The more time you spend making careful, precise cuts the
better the pieces are going to fit together later!
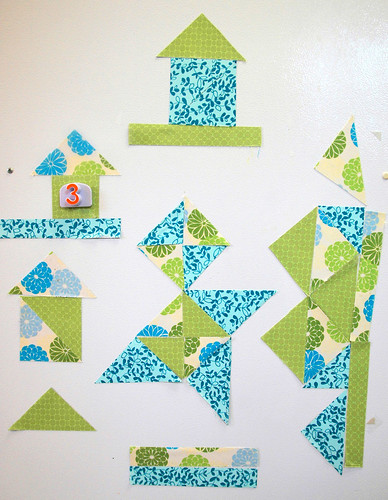
Each of the 8.5 inch squares yielded a good number of triangles to work with (we started with 8 medium and then halved 2 of those again). You could keep cutting them in half but I wanted Claire to be able to handle the pieces easily.
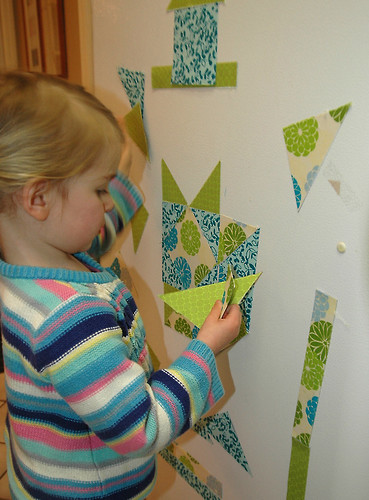
At the moment, there is a nice little quilt square in the center of our fridge and quite a few “houses” are springing up as well. I love having an activity set up on the fridge. It’s a no-mess way to keep my daughter entertained and the fact that this sneaks in a little mathematical reasoning is an added bonus. Of course the cheery colors and patterns don’t hurt my kitchen décor!
EDITED TO ADD --

LOVE LOVE LOVE this idea!!!
ReplyDeletethat is fantastic! I would never find big magnet sheets like that here though so I will have to "think outside the box" on that one.
ReplyDeleteVery cool idea! I have yet to use Mod Podge, but I'm thinking that I could probably use the same idea by attaching magnets to tangrams....although the fabric idea is beautiful!
ReplyDeleteAndrea
This is awesome!! Can I borrow your idea for my homeschool co-op?
ReplyDeleteHi Claire,
ReplyDeleteJust wanted you to know that my hair often looks just like your's when I am quilting. Good work!!
Great idea Claire! Now kick it up a notch! Go and buy an ABC panel and do the same thing with it...back it with magnets and cut the pictures off. Now your daughter can match letter to picture..put them in alphabetical order...talk about beginning sounds. She will be all ready for Kindergarten and the teacher will be thrilled that she got a REALLY smart on!! Thanks for the idea!
ReplyDeleteRetired K/1 teacher!! haha
great! i love it.
ReplyDeleteGorgeous! And such a clever idea!
ReplyDeleteI saw something at a craft fair selling for $$$$ that was probably just these fabric coated magnet sheets place inside a picture frame to hang on a wall for notes or photos. Thanks for showing me how to make it myself!! Love this post!
ReplyDeleteThis is such a great idea! Great for learning shapes and how they fit together too. I love it! I also love that you photographed your child "as is". My hair is like that in the am too. lol
ReplyDeleteThis project is brilliant! I absolutely love it!!
ReplyDeleteThis is so cute! I love quilting, fabric, and refrigerator magnets, so this project is all kinds of awesome!
ReplyDeleteWhat a great idea! I love it. Thanks so much for sharing this!
ReplyDeletethis is awesome!!
ReplyDeleteI adore this!!
ReplyDeletecutest idea ever. i'm so happy to land in your blog. will be coming by more often.
ReplyDeleteThis is a great idea...looking at this gave me some other ideas for this also...so I am gonna need to check it out...Just not sure where you get the magnet sheets...
ReplyDeleteHi there! You can buy the printable magnet sheets from most office supplies like Staples or Office Max, or check out the Avery ones sold on Amazon (see link above). I've just edited my post to include the link because I've received a bunch of questions about where to by the sheets.
ReplyDeleteAdorable! I am definitely trying this.
ReplyDeleteI love this idea. I made 2 sets. One for my 5 yo and one for my 2 yo. Thanks so much for the idea. I wasn't able to have the kids help tho (which is too bad, love the picts of your daughter crafting) since they are Christmas presents.
ReplyDeleteIf you want to see what mine look like you can check it out here: http://notyournormalsteam.wordpress.com/2012/10/21/quilt-blocks-with-a-magnetic-personality/